This article is a continuation of our article guide on Google Business Profile (GBP). In the first part, you can learn what GBP is and how it brings you guests and customers for free. In this part, we will find out how to create your GBP business profile from scratch.
How to add a business to Google Maps and set up your Google Business Profile
To add your business to Google Maps (and Google Business Profile), you need to register in the service, create a company account and confirm it. Here's how to do it step by step.
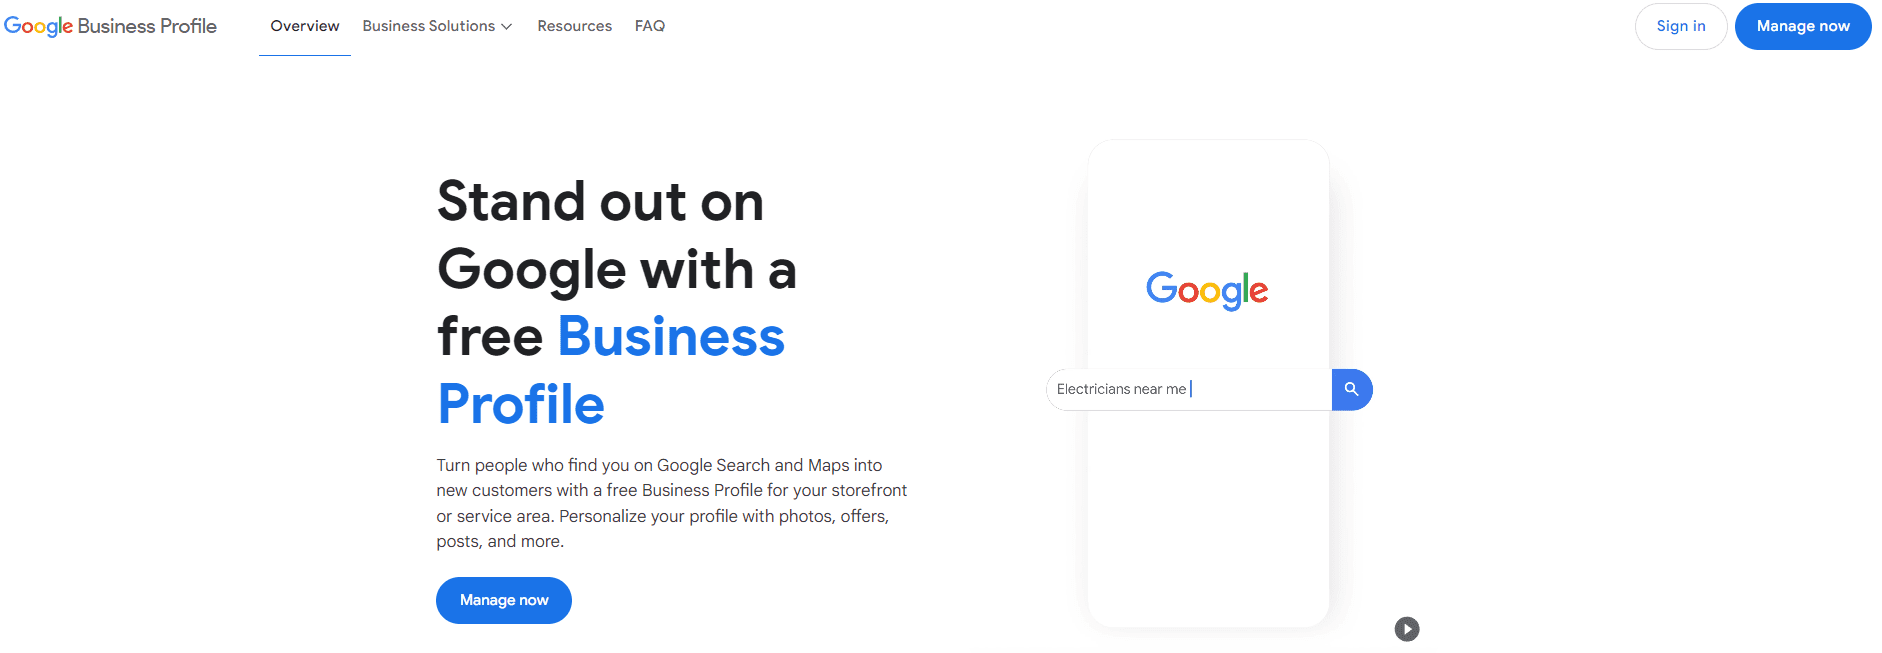
Step 1: Register in the Google My Business service. Go to the Google My Business website and click ‘Manage now’. If you have a Google Mail, just sign in. If you don't have a Google Mail account, sign up. The service allows you to register a business account to your email, but for work, it is better to have a separate one - a corporate one.
If you don’t have an account, follow below to create a new one.
Click on the “Create account” button and choose “To work or my business” from the drop-down menu.
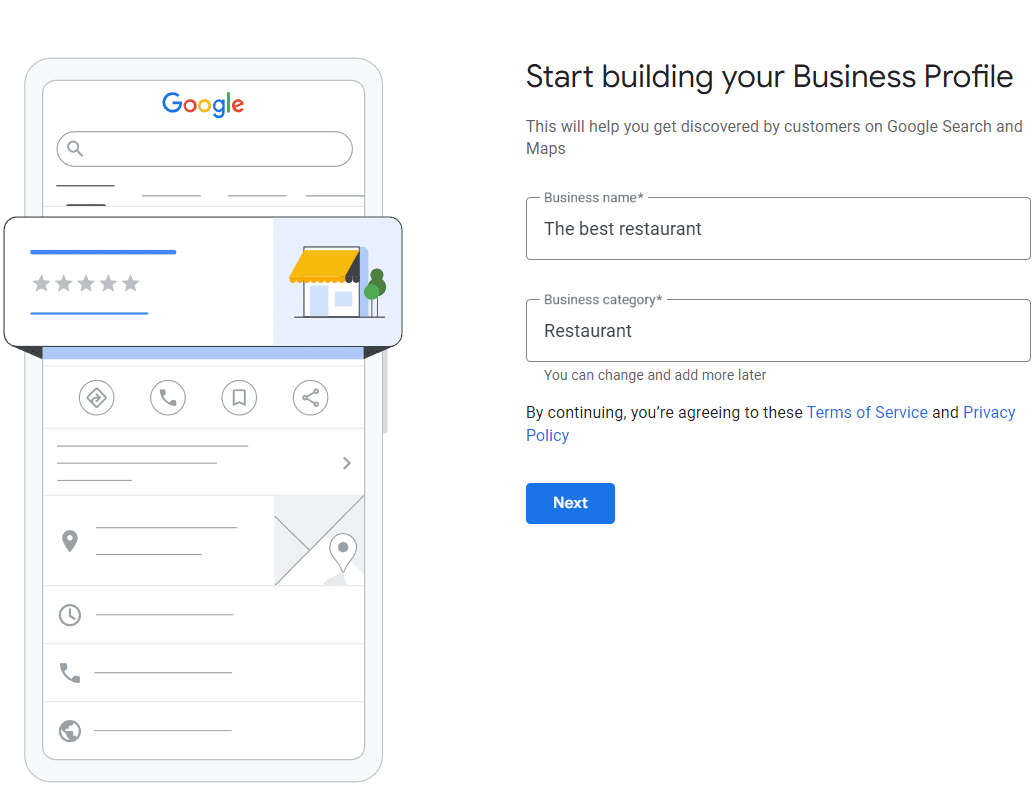
Step 2: Enter the name of your business.
If you have not created a business account before - enter the name in the field. Google will show you a list of existing businesses in its database when you type.
If your business is on the list, skip to the next step to read how to claim your business.
If it’s not, fully type out your business name. Write the exact name of your business and don't try to insert any keywords (you can add keywords in your Business Description later).
If you already have a business account, for example, you have opened a cafe and now you are opening another one under the same brand - choose a name from the drop-down list.
Choose a business category - it tells Google what kind of business you have, making it more searchable.
You can always change your business category or add more categories later.
The service allows you to register business in any language - English, Portuguese, Spanish, Chinese, etc. There are no restrictions.
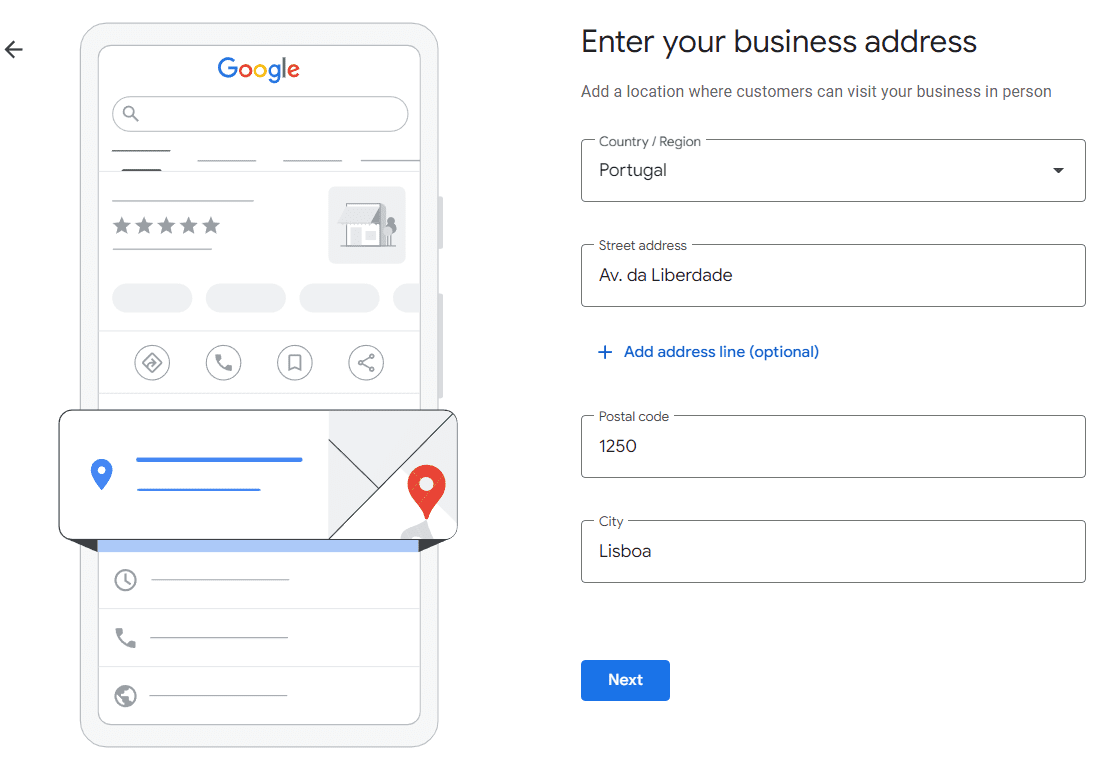
Step 3: Enter the address of the company. Enter the address of the location if you have a physical location or select from the drop-down list.
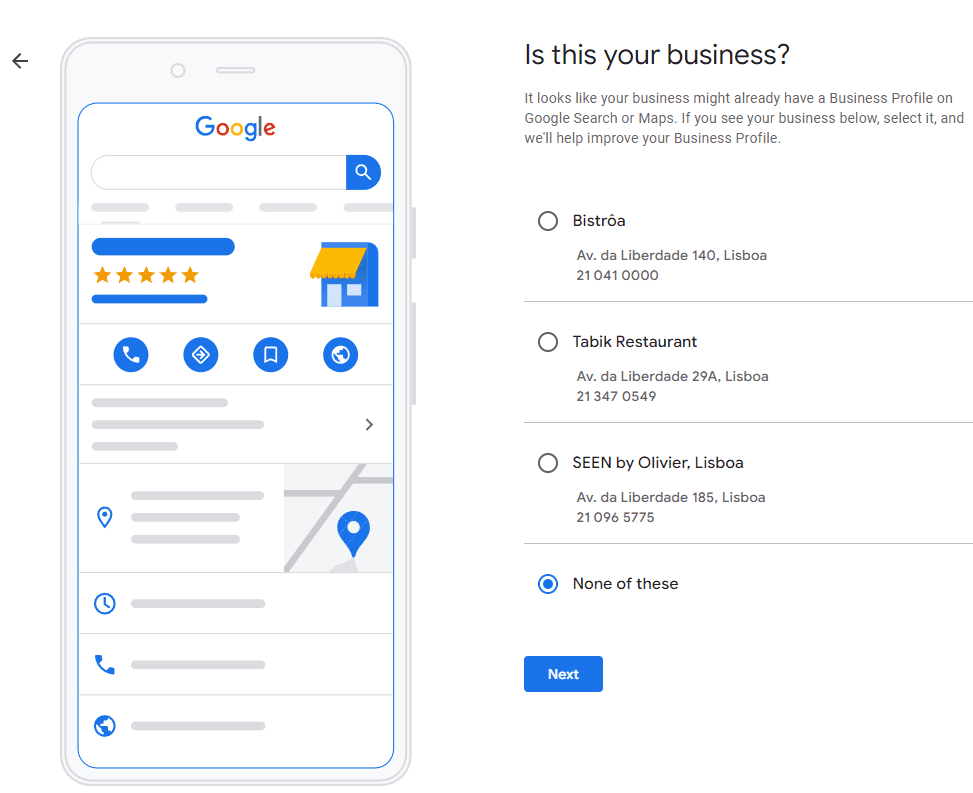
Google uses addresses to give you a list of potential duplicate listings. If one of the duplicate listings is yours, skip to the next step to learn how to claim your business. If not, select “None of these.”
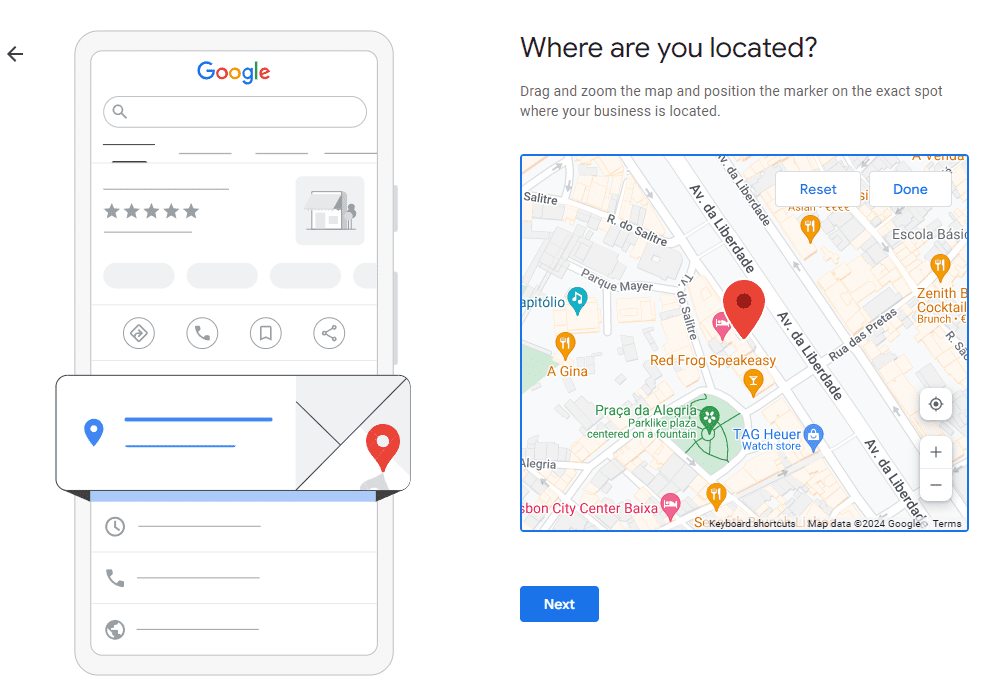
Indicate a point. Put a marker on the map where your company is located.
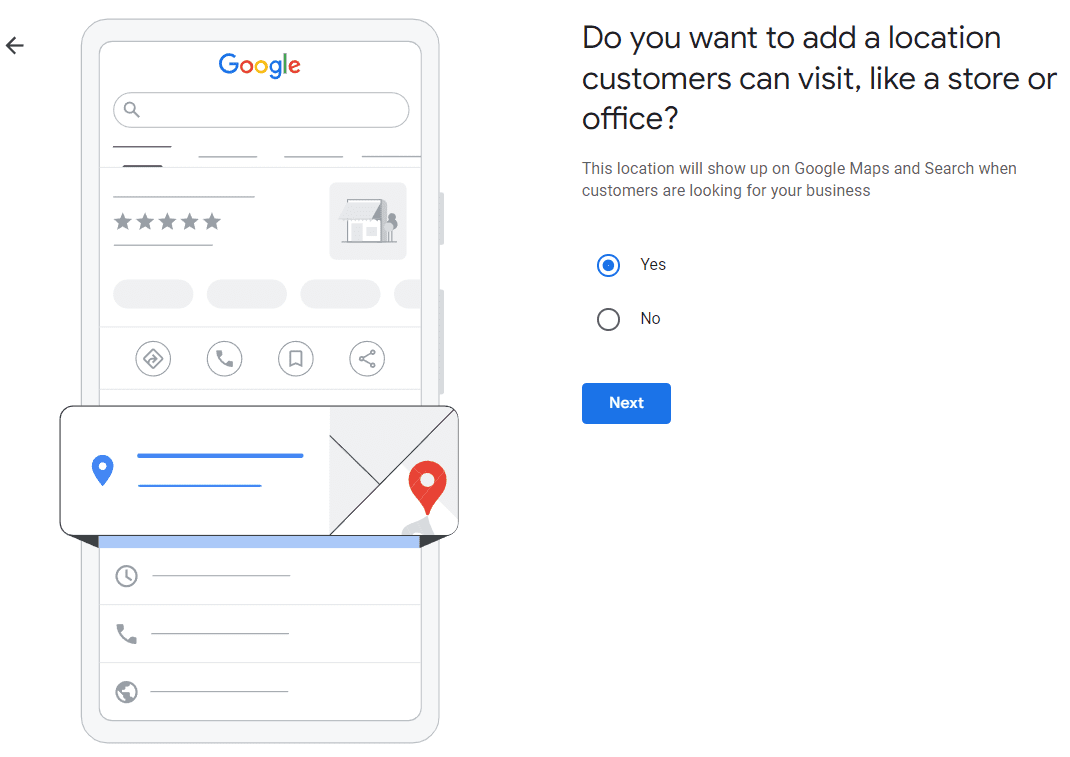
Step 4: Choose Your Service Area.
This step will look different based on whether you added a business address.
If you added a business address, this step is optional. Google will ask you if you provide deliveries or home and office visits.
Choose “Yes” to tell searchers what areas are within your reach.
Choose “No” to skip to the next step.
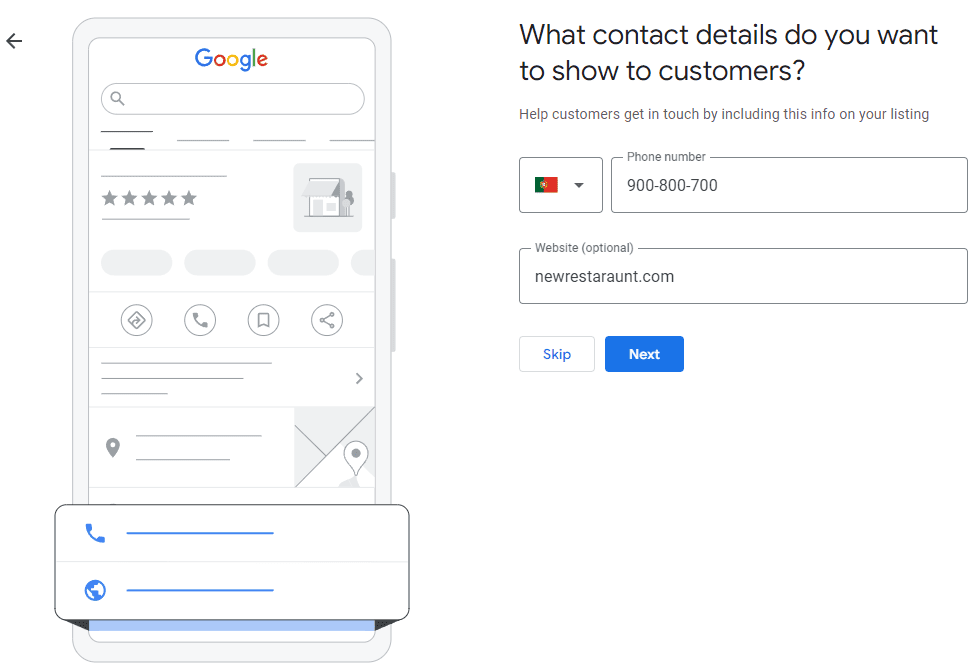
Step 5: Specify company contacts. You can just enter the company's phone number and website - they will be displayed in your business profile. This information is essential - double-check it.
Step 6: Verify your profile.
Your Business Profile won’t become searchable until you verify it. So while you can skip business verification during your initial setup, you’ll need to verify your profile eventually.
There are three ways to verify your profile:
Your Business Profile won’t become searchable until you verify it. So while you can skip business verification during your initial setup, you’ll need to verify your profile eventually.
There are three ways to verify your profile:
- By phone. You’ll receive a Google automated call or text with your verification code.
- By email. You will receive an email containing your verification code.
- By business video. Record a video of your business. Show your location, equipment, and proof of management. Your video is only used for verification and won't be shown publicly.
Step 7: Business information.
After the verification step, Google will prompt you to add more information about your business and opt into relevant services, based on the business category you chose.
You can add specific services you offer, set your hours, enable messaging, and more.
We recommend filling in as much as you can. After all, information like operating hours and business photos will help your potential customers reach you better.
Add information about:
You can find some additional information here at the end of the article.
After the verification step, Google will prompt you to add more information about your business and opt into relevant services, based on the business category you chose.
You can add specific services you offer, set your hours, enable messaging, and more.
We recommend filling in as much as you can. After all, information like operating hours and business photos will help your potential customers reach you better.
Add information about:
- Business hours;
- Specific services you offer;
- Add business description;
- Add photos (photos of the menu and dishes) - an essential part.
You can find some additional information here at the end of the article.
Taking care of you and your business,
Bill&Tip (Bill and Tip) Team.
Want to learn more about how Bill&Tip can help your business or request a consultation from our team, simply follow this link.
powered by studio351.pt
Bill&Tip (Bill and Tip) Team.
Want to learn more about how Bill&Tip can help your business or request a consultation from our team, simply follow this link.
powered by studio351.pt